

Non profits using QuickBooks Online (QBO) face setting up a chart of accounts as one of their first tasks. While QBO provides a chart of accounts (CoA) target out of the box for non-profits, it needs to be customized for most non-profits. In this article, I walk through the steps on how a nonprofit should think about their chart of accounts, how to design the chart of accounts, and how to make the changes in QuickBooks Online.
Table of Contents
Planning a Chart of Accounts
Setting up a chart of accounts is really focused on what will financial reporting look like. Nonprofits will usually start with two key reports. The first a “Statement of Activity” which is similar to a Profit and Loss Statement in a for profit business. The Statement of Activity will have sections for donations and other revenues coming in and then sections for the uses of those donations to fulfill the mission – called expenses.
Statement of Activity: Revenue
Revenues for a non profit usually come from one of three sources:
- Individual donations: individuals who contribute a relatively small sum of money one time or on a recurring basis
- Grants: an organization that supplies a block of funding with a set budget for set deliverables
- Goods and Services: organizations deliver goods or services to a community in return for a not profit generating fee.
These three categories can be further broken down for additional requirements. A simple revenue structure might look like this:
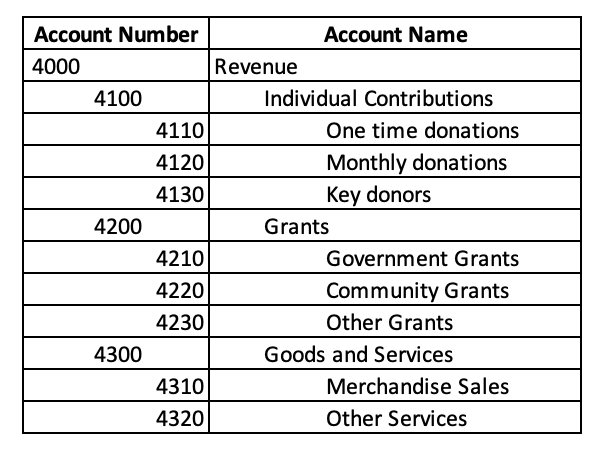
Note how each account is in a hierarchical structure and that each account has an associated account number. Normally, most companies use account numbers starting with “4” for revenue.
Statement of Activity: Expenses
Expenses are how funds are used in a nonprofit. Expenses are usually more complicated to classify, but most nonprofits will break down their expenses into four categories:
- Salaries and Benefits: expenses for payroll, taxes, and benefits for staff.
- Program Expenses: expenses related to directly delivering the non profit’s mission and goals
- Fundraising Expenses: expenses related to fundraising
- Overhead: expenses not directly tied to program or fundraising – think office, insurance, accounting, and so forth.
The reason for these four categories is that most nonprofits have these type of expenses; but also because the IRS requires a breakdown of functional expenses. The functional expense breakdown is usually done through the chart of accounts for small non profits, but other structures are possible.
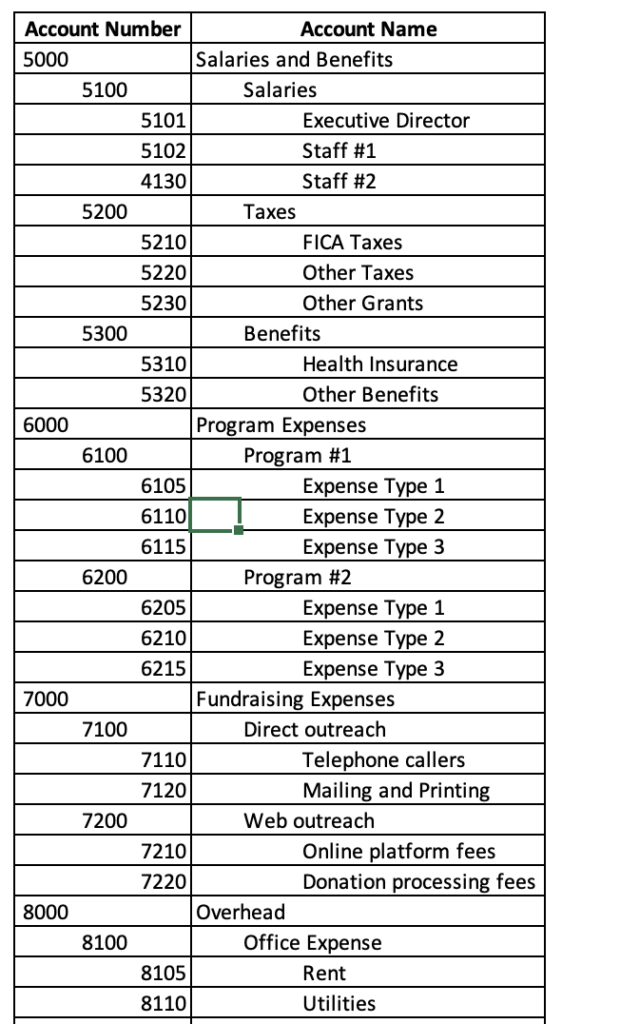
Expenses usually start with numbers 5 through 8 with each major type of expense starting with a new number.
Statement of Financial Position
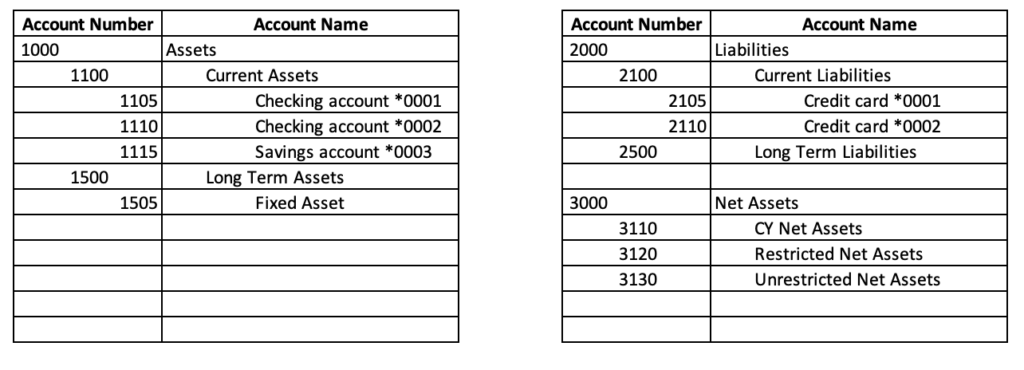
The second key report is the Statement of Financial Position. This report shows a nonprofit’s assets (what they have ), liabilities (what they owe), and net assets (what’s left over). A nonprofit just starting out will usually have a very simple account structure with the following types of accounts:
- Current Assets – these are accounts representing what a non profit has that can be used to generate future benefits within 12 months. The simplest example is cash in a checking account. Usually, I give each bank account its own QBO account and end the description with its last four bank account number.
- Current Liabilities – these are accounts representing what a non profit owes to someone else in the next 12 months. The simplest, and most common example is a credit card that must be paid off each period.
- Net Assets – in for profit firms, this section is called equity, but for a nonprofit, it’s simply the difference between assets and liabilities. These are further broken down by their restriction – whether the asset is tied up for a specific purpose or not.
Assets are usually customarily numbered starting with 1, Liabilities with 2, and Equities with 3.
You can download the entire example chart of accounts here:
Setting up a Chart of Accounts in QuickBooks Online
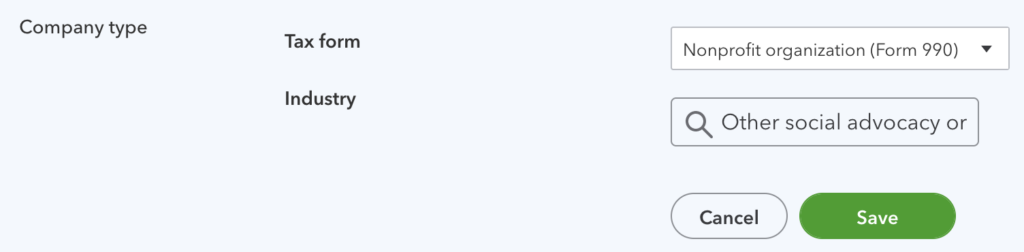
The first thing to setup before creating the CoA is tell QBO that you’re a non profit. To make that change, click the gear icon in the upper right corner, and then click “Account and Settings”. That will bring up this screen:
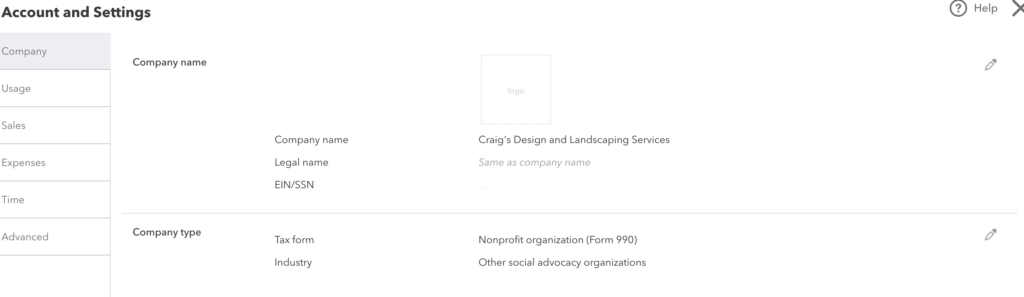
Now under “Company type” click the pencil icon. Change the Tax Form to “Nonprofit organization (Form 990)” and Industry to “Other social advocacy” or a similar type to a non profit.
Then, by clicking Advanced on the left side, change “Enable Account numbers” to be “On” and turn on “Show account numbers.”

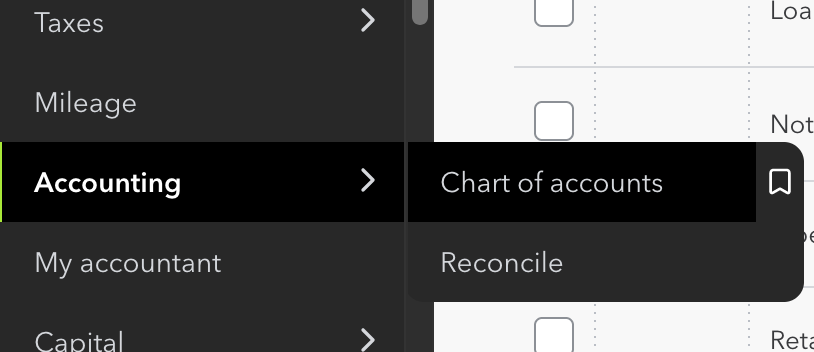
Now, the chart of accounts needs to be edited to meet the structure you’ve outlined. To do that, in QBO, click “Accounting” and then “Chart of Accounts”
After that, the Chart of Accounts is displayed. You can then modify the chart to match the structure you previously defined. If you need more help navigating this screen, Intuit has a good video here. Look out for the next post with a list of fields on each GL account and what it does.